Nostalgic Christmas Sugar Cookies. Buttery, sweet sugar cookies and edible nostalgic Christmas wafer transfers make these cookies delicious and beautiful. [social_share/] Yum
[social_share/]
Happy Holidays!! They are coming up on us quickly and we are having so much fun! I have always loved the holidays, there is something so magical about this time of year. Each night I turn off all the lights and plug the tree in and gaze at its beauty. Then I move the elf (on the shelf), we have part taken in this tradition and I have to admit I get a bit carried away because our daughter loves it so much. Plus I might use it as a ploy to get my daughter into bed and asleep faster by telling her the elf is watching and will report to Santa…so far its working like a charm. So todays post is about a wonderfully fun product I found a few years back and have incorporated into my holidays. Edible wafer/transfer papers. These sweet little transfers are completely edible (potato starch being the main ingredient) and tasteless. They come in a variety of different pics and are easy to use.
[social_share/]
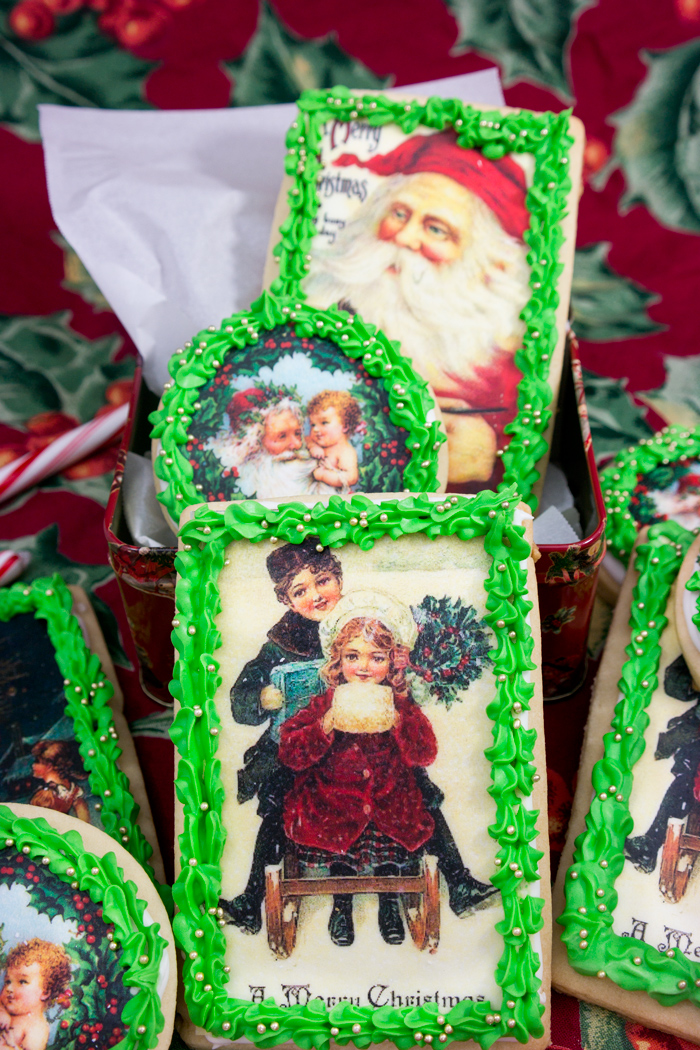
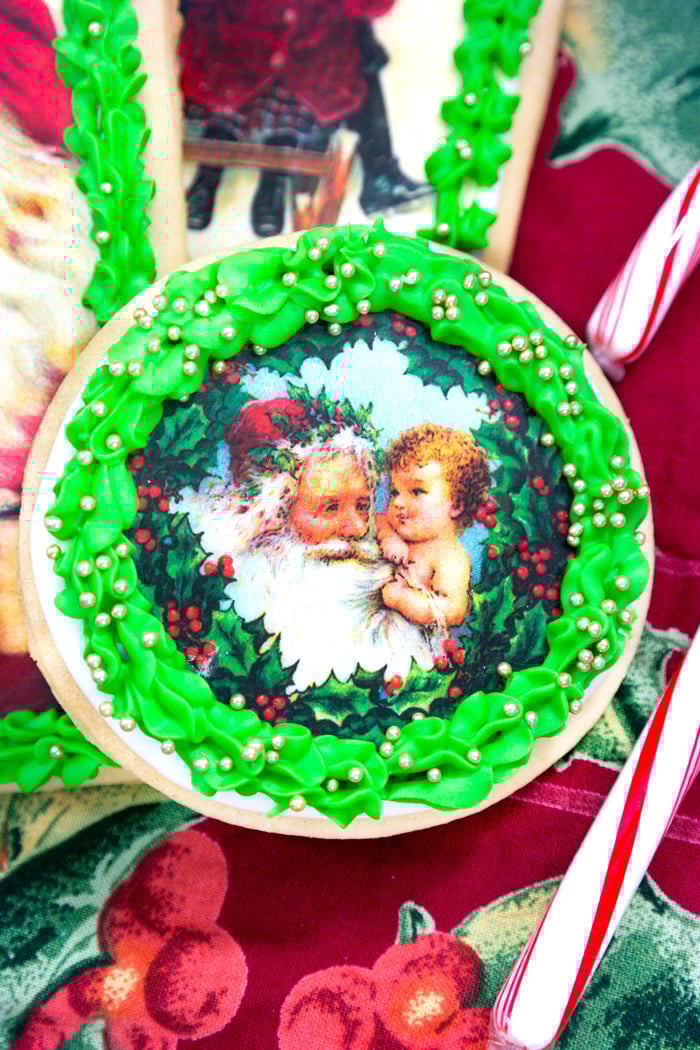
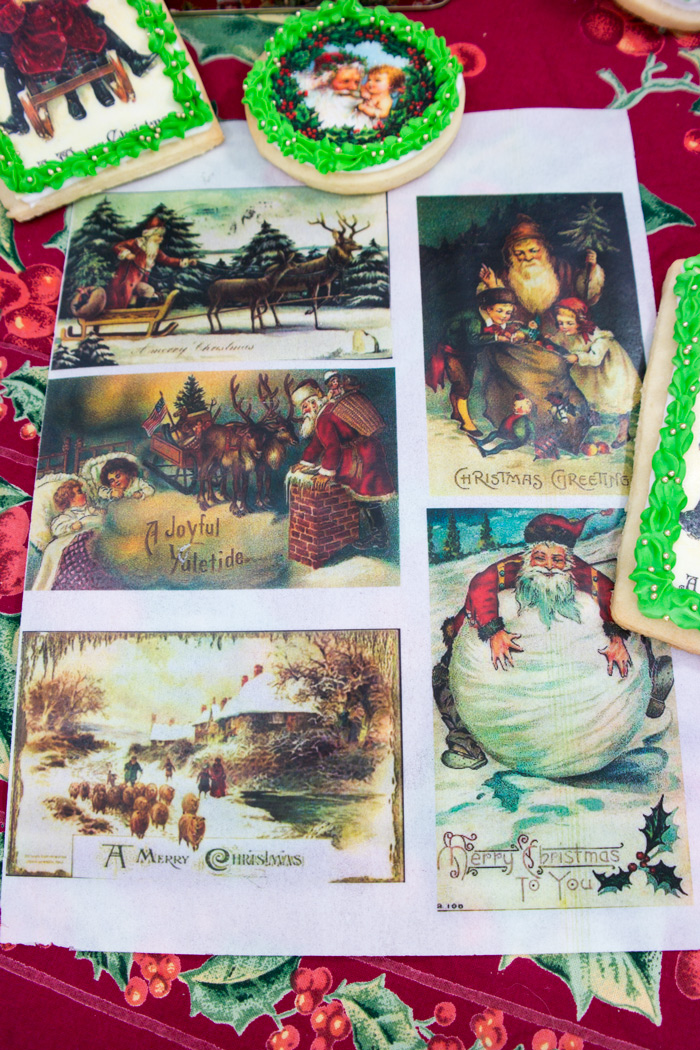
Each year I favor the nostalgic Christmas post card style transfers, bought here. I think the art work is beautiful and everyone really enjoys them. All you need is sugar cookies (my favorite recipe minus the buttercream for this post), royal icing and these transfers and you are good to go. The process goes quite smoothly as long as you are prepared. You will want to lay out your cookies, cut out your transfers (they come on full sheets) and have your royal icing ready in the piping bag. Note that when you cut out the transfers that your hands are dry, they react to moisture. 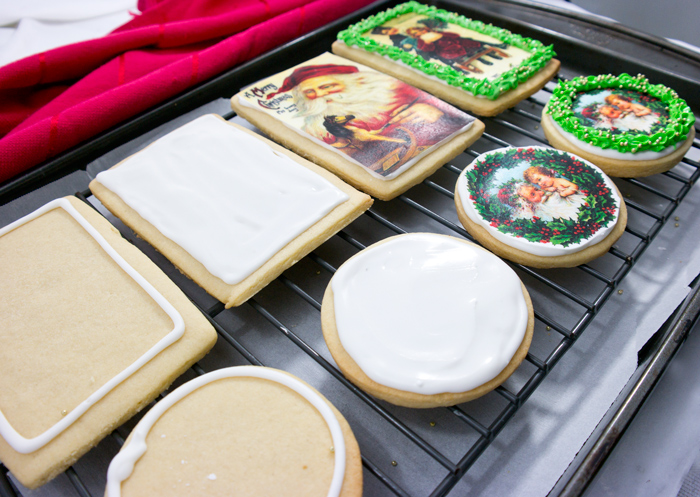
[social_share/]
First I start by piping a border on each cookie a little bigger than the transfer, the royal icing consistency should be sturdy enough that it does not spread on its own. Once done flood the inside of your border, your royal icing should be a little runnier for this, spread out evenly with in the border to make as flat and even as possible, moving quickly place the cut out transfer into the wet royal icing. Gently press the transfer onto the icing so it adheres and let dry. Next the fun part, the decorative border. Color your royal icing as you wish and make it a stiff consistency so it holds it piped shape, then garnish with sprinkles. Let dry. That’s it. Well of course that is until its time to eat them…then get the coffee and start eating. 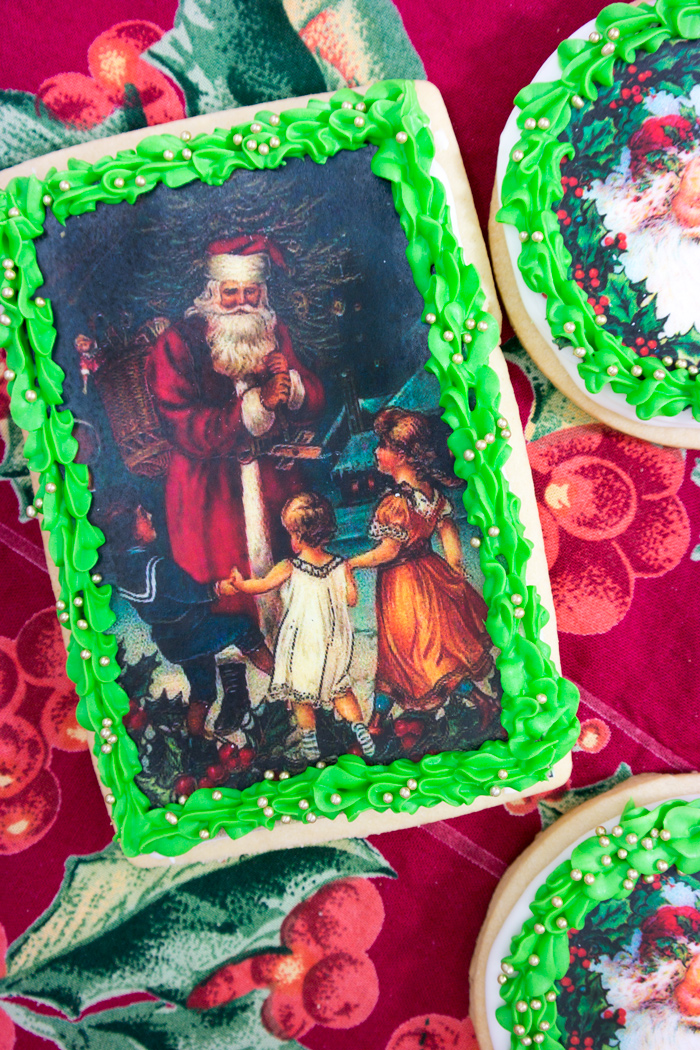
[social_share/]
So enjoy this fun way to decorate your holiday cookies! They also look great wrapped in cellophane bags and tied with a ribbon. Enjoy!
Nostalgic Christmas Sugar Cookies
Ingredients
Method
- First I start by piping a border on each cookie a little bigger than the transfer, the royal icing consistency should be sturdy enough that it does not spread on its own. Once done flood the inside of your border, your royal icing should be a little runnier for this, spread out evenly with in the border to make as flat and even as possible, moving quickly place the cut out transfer into the wet royal icing. Gently press the transfer onto the icing so it adheres and let dry. Next the fun part, the decorative border. Color your royal icing as you wish and make it a stiff consistency so it holds it piped shape, then garnish with sprinkles. Let dry.
Notes
** If royal icing is too runny add powdered sugar 1 Tbsp at a time until desired consistency is met.
***If royal icing is too stiff add water 1 Tbsp at a time until desired consistency is met.
**** Store cookies in air tight container.
Tried this recipe?
Let us know how it was!
Wow – these cookies are so gorgeous! Those transfer papers sound amazing – I definitely need to try decorating with them!
Thanks Rachel! They are so much fun to use. Take care.
Wow! I really can’t believe how gorgeous these are! They belong in the window of a most beautiful bakery… Thank you for sharing cookies that I could look at all day! 🙂
Thank you so much Annie. They really are a great treat to make and give at the holidays. Take care.
OMG those cookies are CRAZY TOWN!!! I am not quite sure how I would eat them! LOL!
Thanks Gigi! Agreed, they are too pretty to eat but that hasn’t stopped me, lol. Take care!
Oh my gosh, this is so cool!!! I love this idea 😀
Thanks Kristi! They are great to work with. Have a great holiday!
Omg, these have to be the most Christmas-y Christmas cookies I have ever seen!!! Love the nostalgic tranfers! These are pretty dang genius!! Pinning! Hope the holidays are treating you well! Cheers!
Thanks Cheyanne!I love how classic the transfers are, they add a special touch to a cookie. Take care and have a wonderful holiday!